Wires-X setup
Follow the HRI-200 setup instructions and get the software installed and confirm that the network is working and all of the network ports are open.
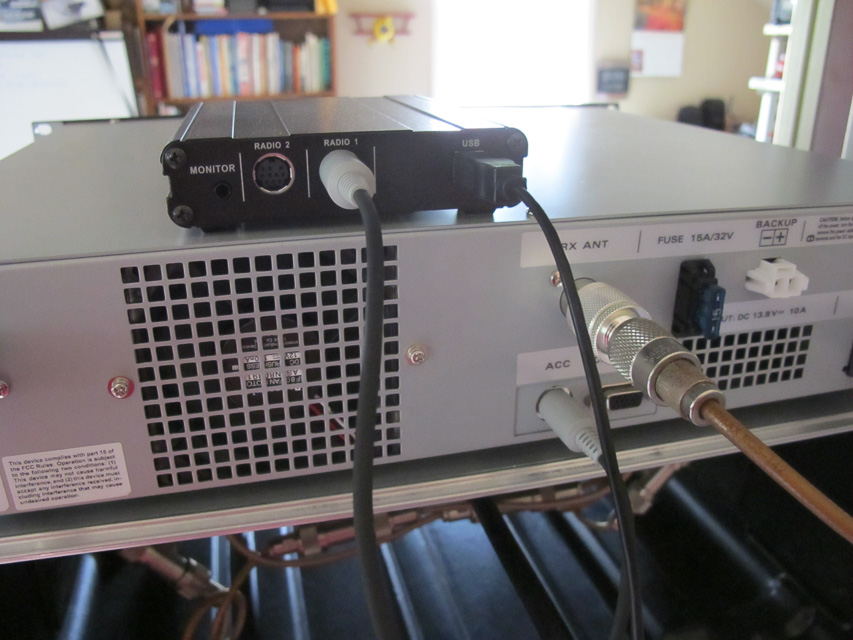
The next step is to connect the HRI-200 interface to the repeater. Be sure to use the grey cable that came with the HRI-200.
After connecting the repeater to the HRI-200 restart the Wires-X app and enter the Transceiver setup screen. Analog is the only choice that will work even if other options are shown.
If you populate the fields in the Voice CH section, this additional detail will be included in your Wires-X listing in the directory.
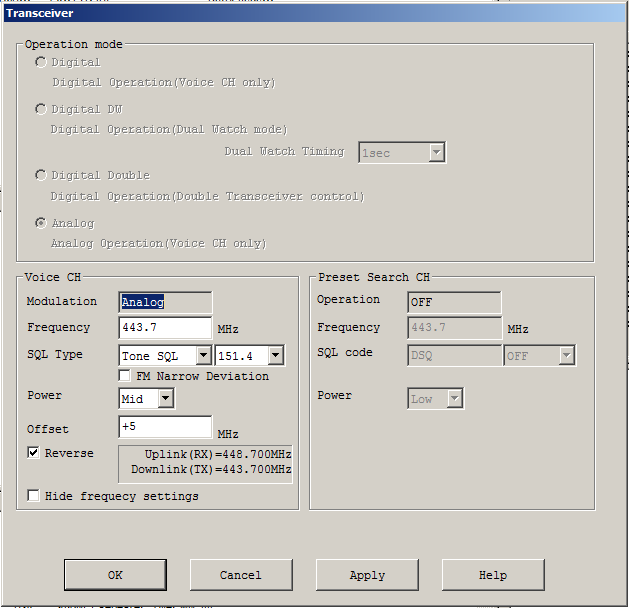
I have intentionally skipped the WIRES ID, Location settings and Round QSO windows. These are straightforward to config, if questions are raised I can add additional detail.
HRI-200 Setup
Next step is the config of the HRI-200.
- Copy what you see here.
- Press the “Write” button.
- Press the “HRI-200 Information” button which will read from the stored values in the HRI-200.
The goal is to ensure that the values in the left grayed out column agree with the values in the right white column.
Note the jury is still out on Pre-emphasis I currently have it off despite what the screen shot below indicates.
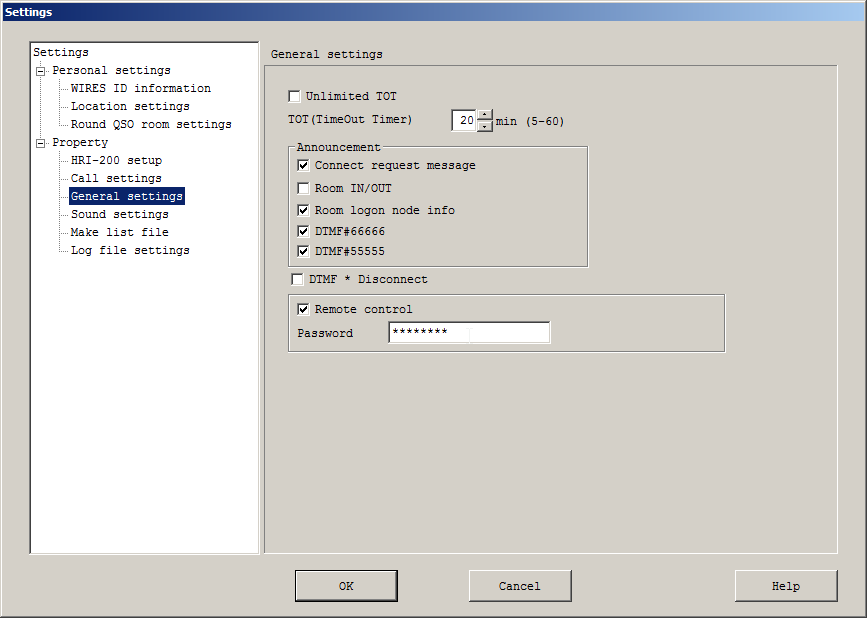
General Settings
The items on this page are not critical to getting the Repeater to play with Wires-X. I have included it to note that what does not work as expected. Joining rooms and the two DTMF commands do not announce if enabled on the Sound Settings page. From what I have read Wires attempts to send, however since the repeater is active locally the output audio is lost. This local takes precedence problem also causes issues with ID announcements, more in the next section.
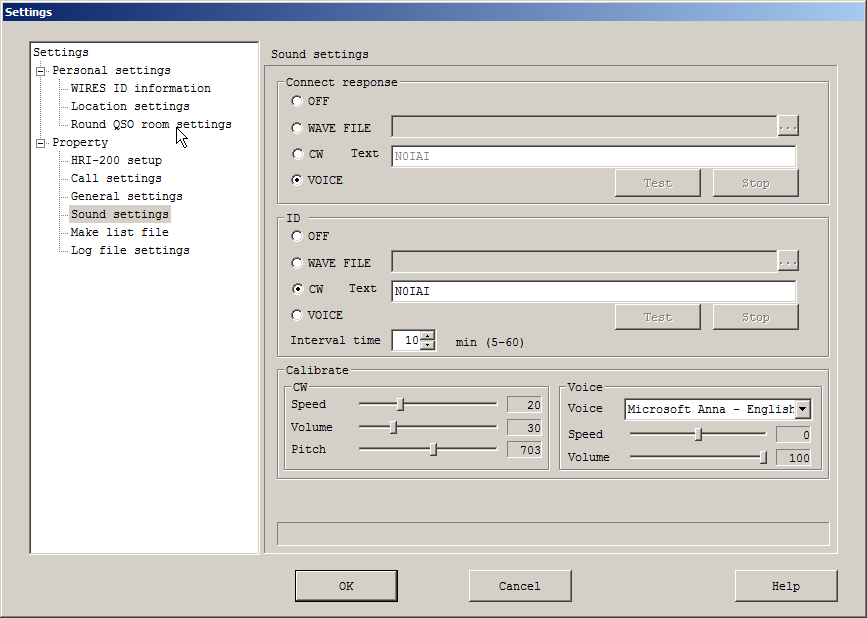
Sound Settings
From what I have read when the internal controller ID’s it tends to ignore Wires-X input. I have disabled the internal repeater ID and will rely on the Wires-X ID.
Working to confirm if local repeater traffic prevents the WiresX ID from being added to the transmit audio path.
Thank you so much for taking the time to share. That is truly in the spirit of Amateur Radio, and I tip my hat to you.
KØLDO
Brunswick, Maine
Thank you Mike.
73, Jay
Alguno sabe como conseguir que el Windows 10 reconozca el cable de datos USB que lleva el Yaesu FT-70 DE desde hace un año lo intento y no hay forma y Yaesu no sabe no contesta.
Y como hacer que se pueda transmitir hacia un PMR pues solo deja oir sintonizando frecuencia manualmente en 446.
Gracias
Someone knows how to get Windows 10 to recognize the USB data cable that the Yaesu FT-70 DE has been using for a year now, and there is no way and Yaesu does not know does not answer.
And how to make that can be transmitted to a PMR because it only lets hear tuning frequency manually in 446.
Thank you
Windows 10 is normally good at installing drivers. Is it an aftermarket cable or sourced from Yaesu?
Regards, Jay