
Background
Part of the getting active process included a review of my current equipment situation and determining what still had useful life and what needed to be replaced. The battery pack for my handheld no longer held a charge and while looking for a replacement I was surprised to find new dual band handhelds for the price of a replacement battery. In addition to picking up a new battery from Batteries America for my old Kenwood, I also decided to take a chance and order a Baofeng handheld with accessories.
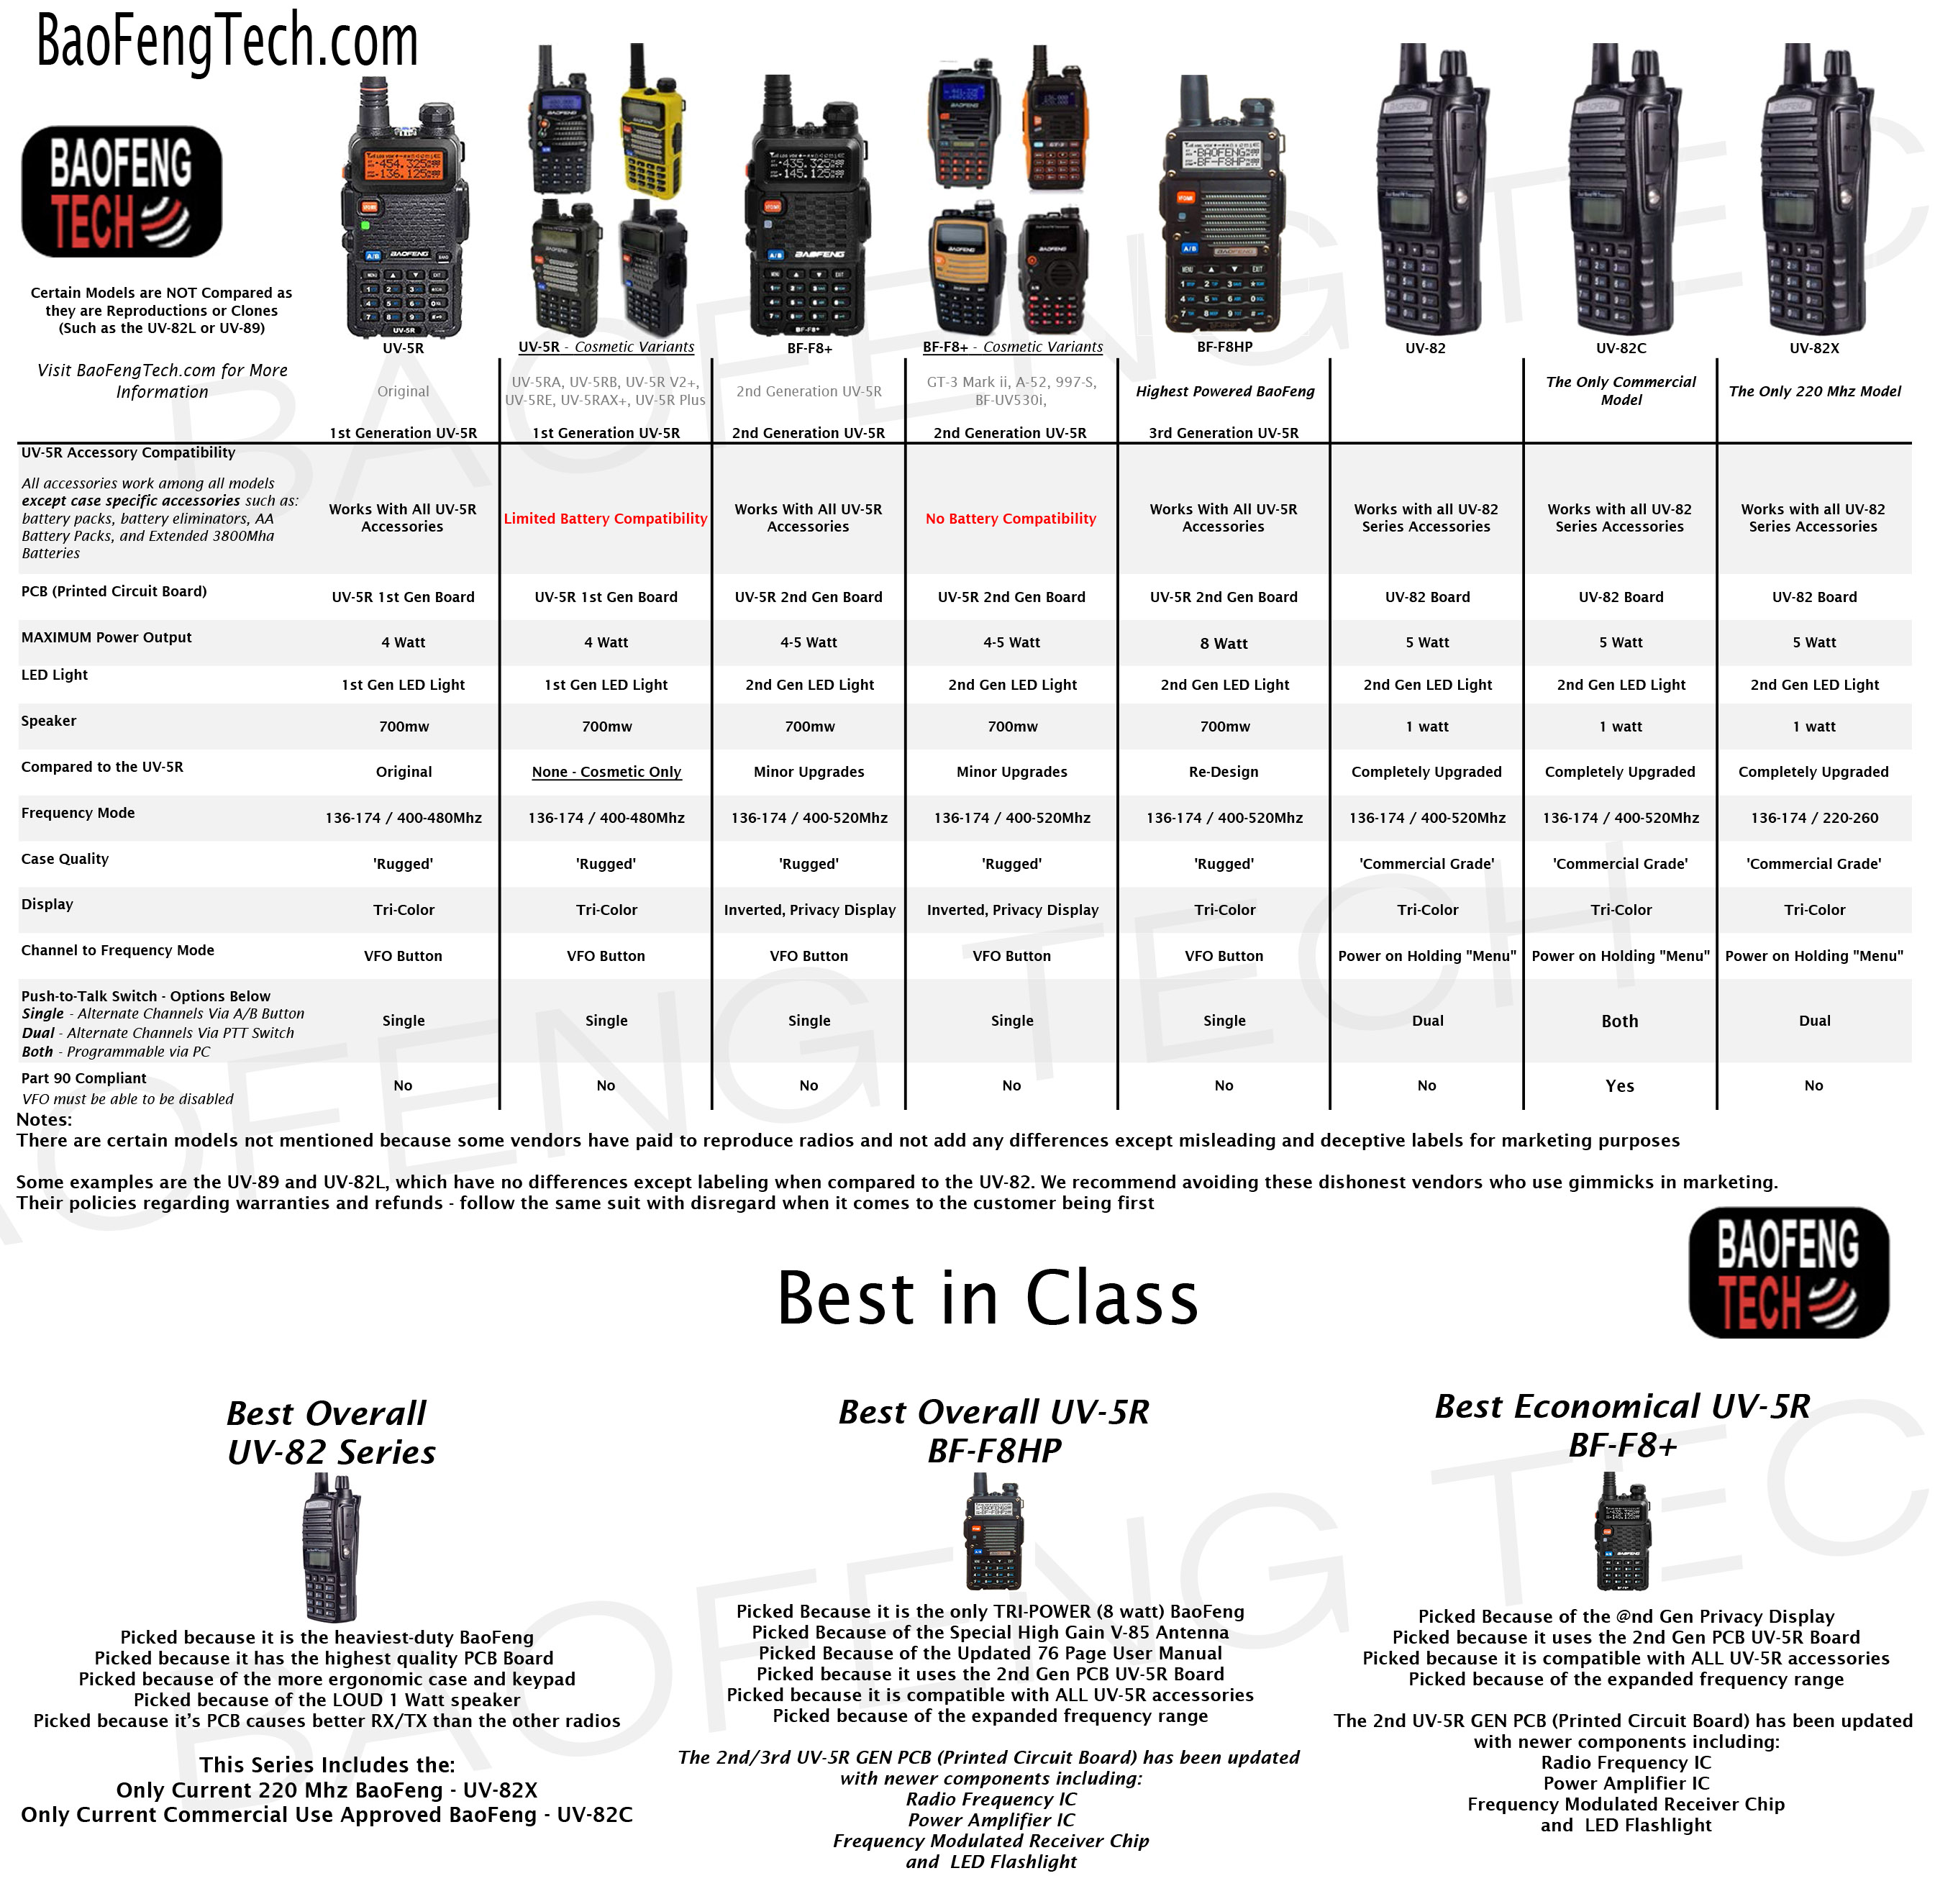
I knew that as part of rebuilding the shack I would be doing some tower work and I did not what to climb with a valuable radio so it seemed reasonable to “invest” in one of the cheap handhelds on the market. The first problem I faced was which one to choose as the model variation is a little nuts and it is a challenge to separate the wheat from the chaff. To help with that chore I found the following comparison chart over at BaoFengTech.com and with the knowledge gained I decided to go with a BF-F8+ which I ordered from Amazon along with a speaker mic and a programming cable.
Programming cables
A word of note on the programming cables, with cables using copied Prolific chip sets I decided to spend a few extra bucks and go with the cable using the FTDI chipset and I have had zero problems with Windows 7 recognizing the cable and loading the proper drivers.
Radio programming
Thanks to Amazon Prime in a few days the order arrived and on to the next challenge, programming. During my research I found a lot of great information at www.miklor.com/ and it was my first stop after the battery was charged.
Auto Amazon Links: No products found.
The sequence to setup the radio consisted of:
1) Download and install Chirp (link is at www.miklor.com/ )
2) Plug in the USB programming cable and let Windows find and install the pseudo serial drivers.
3) Connect the cable to the handheld and power on.
4) Download the current config from the radio
5) Referring to the recommended settings on www.miklor.com, modify the config as needed, save to disk as a backup, and push the config to the radio.
6) Power the radio off, disconnect cable and power back up.
7) Operate radio.
So far so good 😉
Summary
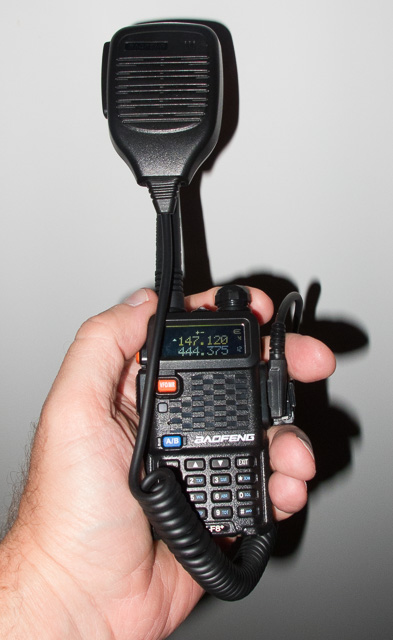
It is tiny, easily slips in a pocket and the battery life is amazing and I have gotten good signal and audio quality reports back from the local repeater crew. I did notice that if I set it on the table near my PC it is deaf as a post, not really fair to blame the radio just took a while to figure out that it was not a radio problem but an environmental issue. To be fair my other handheld exhibits the same problem when less than a foot from my PC.
The interface takes a bit getting use to and the manual is less than ideal, but so much information is available on the web it is really not an issue.
The build quality is good, it is a tremendous value and well it just works. I think I will pick up a UV-82C next.
73’s Jay
Leave a Reply